Condominium operations

Practical guide

Manager guide: from first login to full operations

A step-by-step walkthrough to set up your building, keep finances in order and run the day to day with Domuno — with a real screen for every stage.

  • 15 chapters
  • ~20 min read
  • For beginners

Phase 1 — Get started

Sign in to your account

What you will do: Sign in for the first time and choose the language.

  1. Open your condominium address on Domuno in your browser.
  2. Select “English” from the language selector in the top-right corner.
  3. Enter the email associated with your account in the “Email” field.
  4. Type your password and press “Sign in”.
  5. If you forgot your password, use “Forgot password?” to reset it by email.

Tip

Nothing to install. Domuno opens in current browsers, on computer and phone.
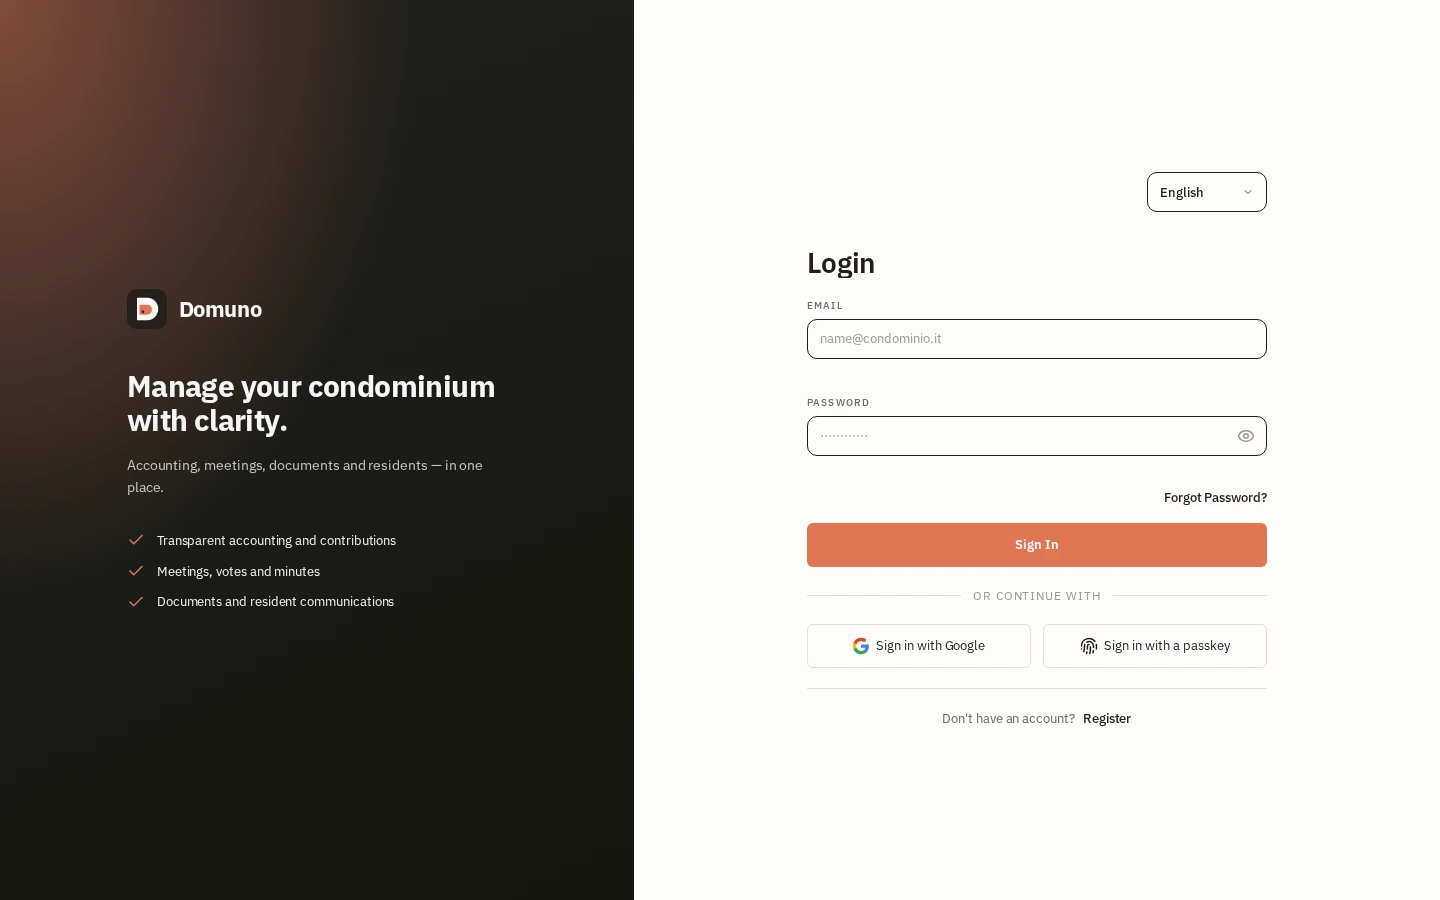
Login screen with language selector and email/password sign-in.
Next: Check the day-to-day situation

Check the day-to-day situation

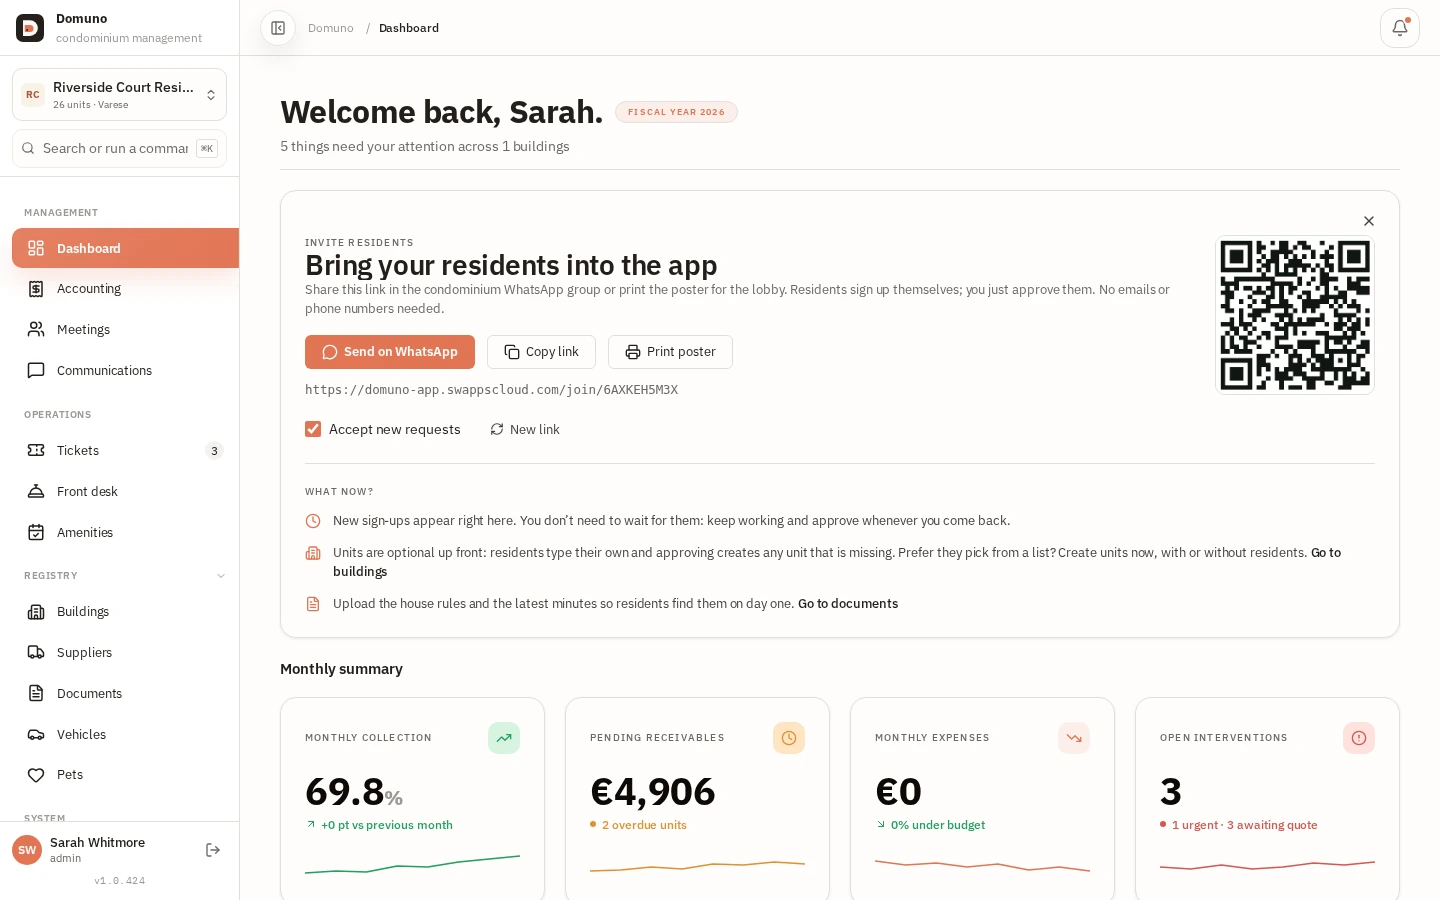
What you will do: Use the dashboard to verify the building’s status at a glance.

  1. After signing in you land on the dashboard of the selected building (e.g. Aurora Residence).
  2. Check the top indicators: “Collected this month”, “To be collected”, “Expenses” and “Open tickets”.
  3. View the cash-flow chart and the next meeting with its quorum progress.
  4. Scroll to the bottom for “Recent activity” and the approvals awaiting you.

Tip

A quick daily scan of the dashboard surfaces overdue accounts, urgent tickets and pending approvals.

Manager dashboard with status indicators, cash flow and next meeting.
Next: Invite the residents

Invite the residents

What you will do: Bring residents into the app without needing everyone’s email or phone number.

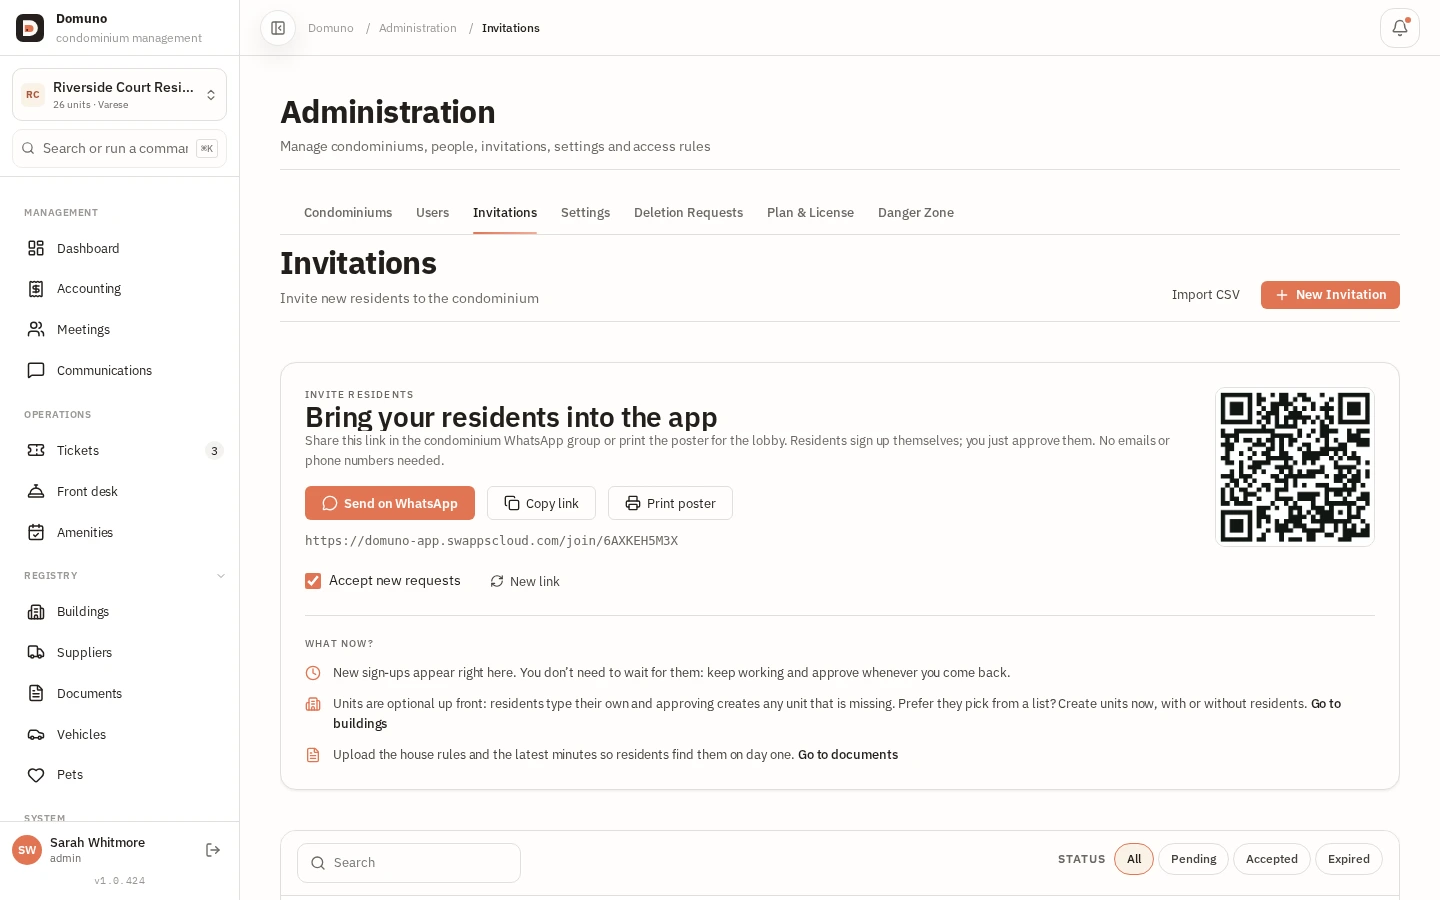
  1. Open “Administration” (gear icon) and stay on the “Invitations” tab.
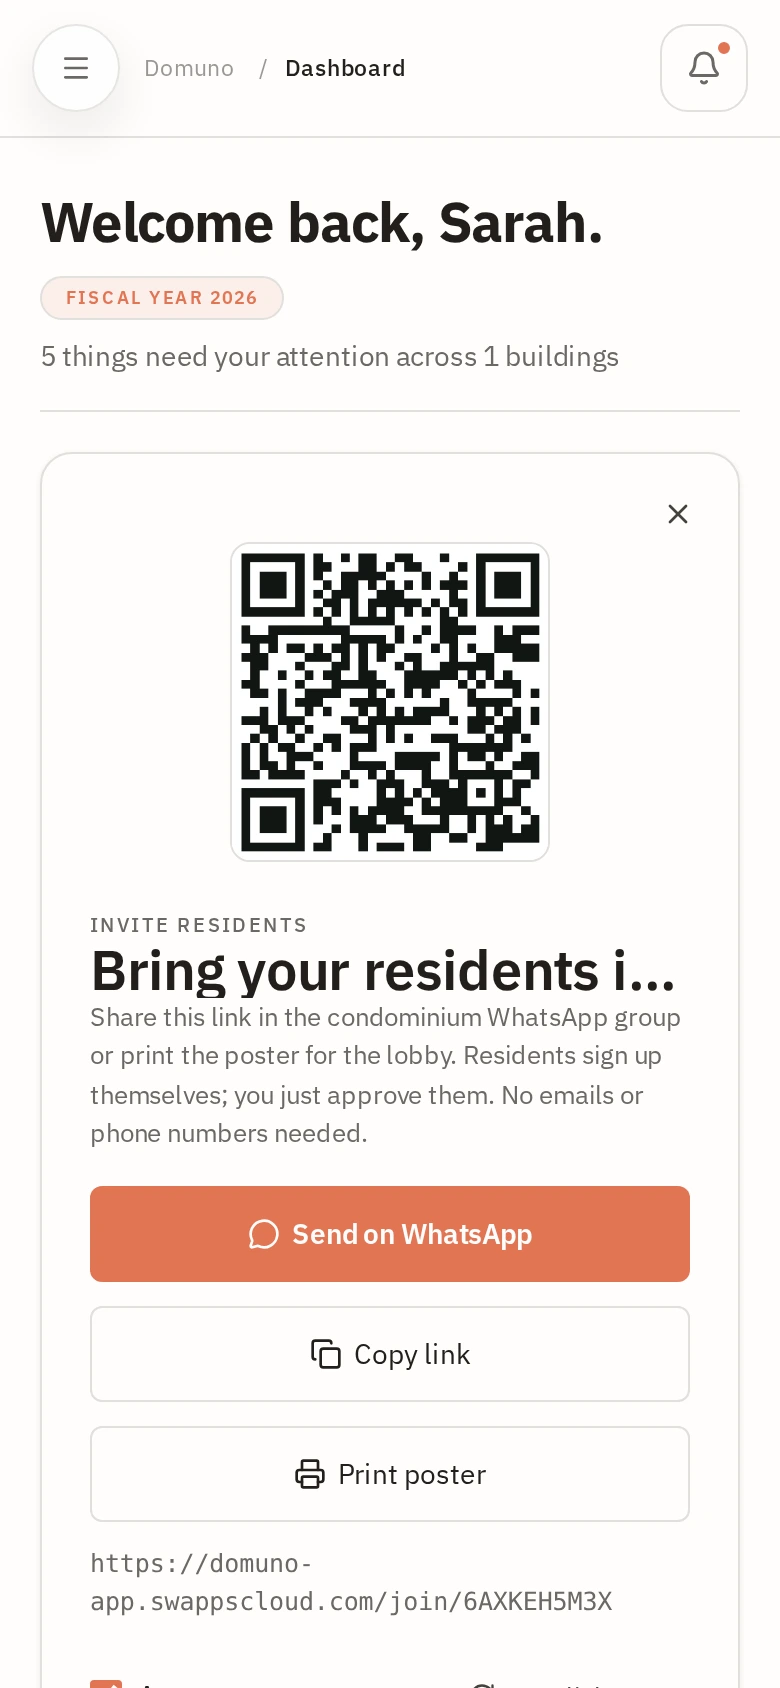
  2. At the top, use “Send on WhatsApp” to share the link in the building’s group, or “Copy link”.
  3. Prefer a poster for the lobby? Click “Print poster” — the QR code is already on it.
  4. Each resident signs up themselves with a name, email, password and their unit.
  5. Requests land in the “Waiting for approval” list. Click “Approve” on each one, or “Approve all”.

Tip

No need to wait for residents to sign up before continuing: create units and upload documents any time, in any order.

Invitations tab with the building’s link/QR code and the list of requests awaiting approval.
Next: Register the building and units

Register the building and units

What you will do: Set up the property and its units so you can manage everything.

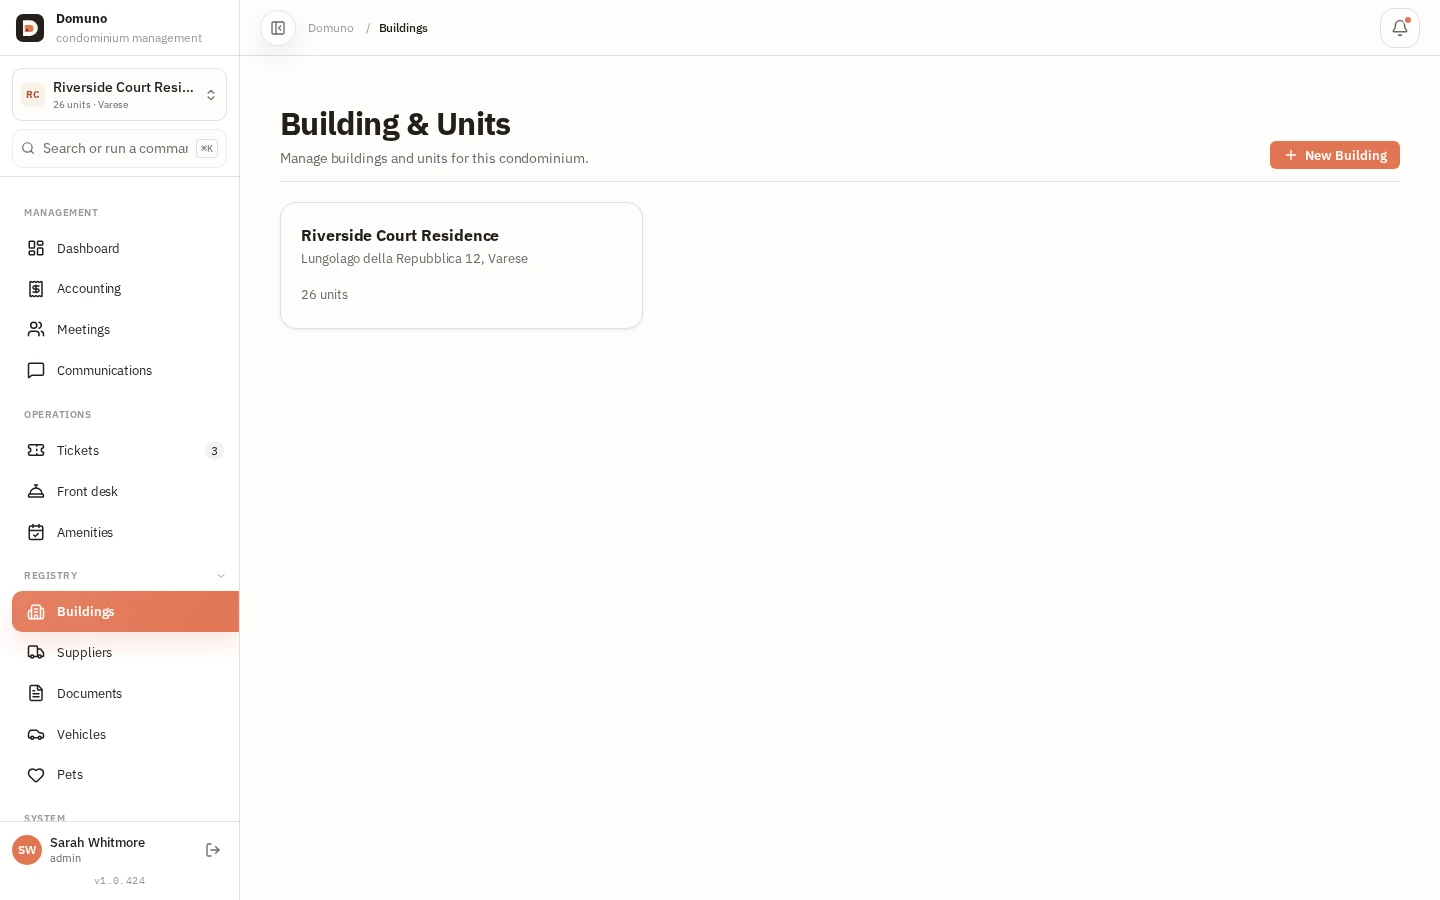
  1. In the sidebar open “Buildings & units”.
  2. Click “New building” and fill in the address and details.
  3. Inside the building sheet, add the units (apartments) with their numbers.
  4. Then use each unit to assign expenses, invite residents and track balances.
List of managed buildings with address and number of units.
Next: Control income and expenses

Phase 2 — Day to day

Control income and expenses

What you will do: Keep the building’s accounting organized in one place.

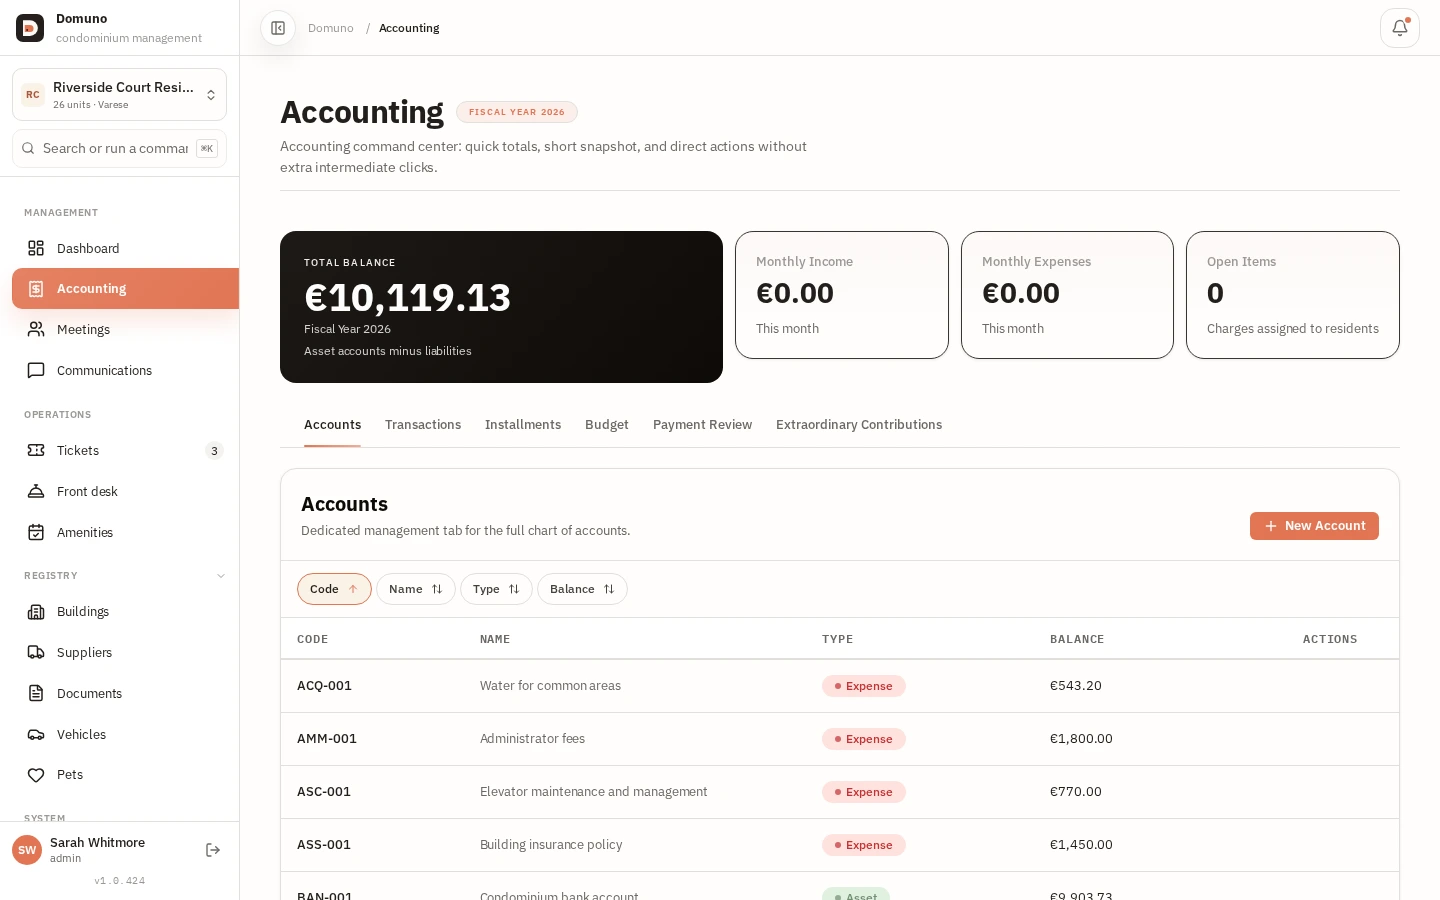
  1. Open “Accounting” in the sidebar and go to the “Accounts” tab.
  2. See the chart of accounts: each item has a code, name, type (Cost/Income) and balance.
  3. Click “New account” to add an income or expense line.
  4. To record a movement, use “New transaction”: date, description, amount and supplier.

Tip

Linking each expense to the correct supplier keeps accounting and the work history consistent.

Accounts tab with the chart of accounts and balances.
Next: Record every accounting entry

Record every accounting entry

What you will do: Enter each income and expense with description and supporting document.

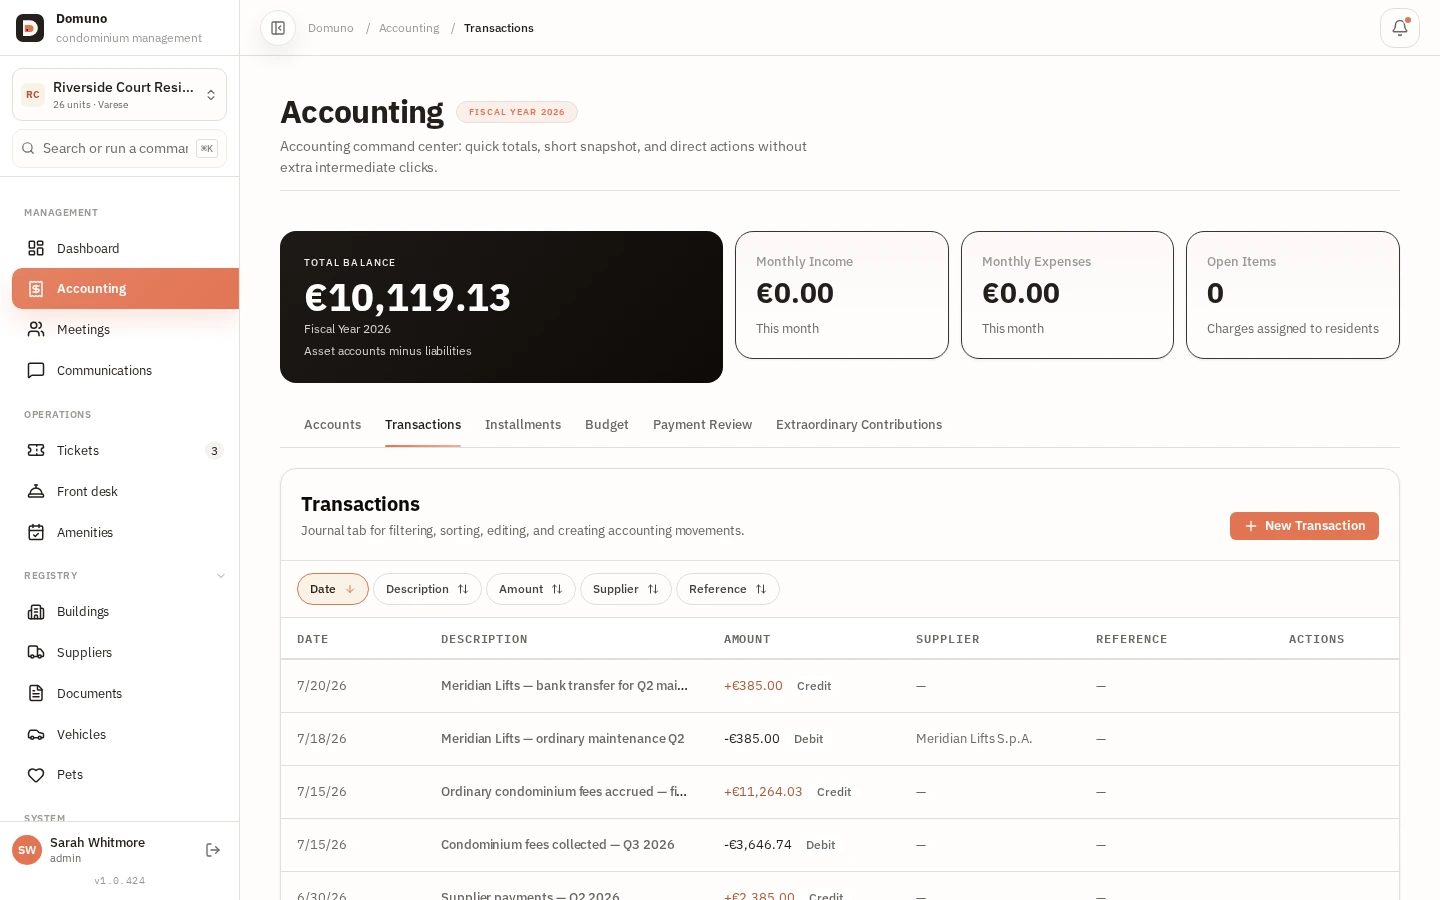
  1. In Accounting open the “Transactions” tab.
  2. Click “New transaction” and enter date, description and amount.
  3. Choose the account (e.g. Maintenance) and, if relevant, the linked supplier.
  4. Save: the entry appears listed and updates the account balance automatically.
List of accounting transactions in date order with description and amount.
Next: Charges and arrears

Charges and arrears

What you will do: Track who pays and who is behind.

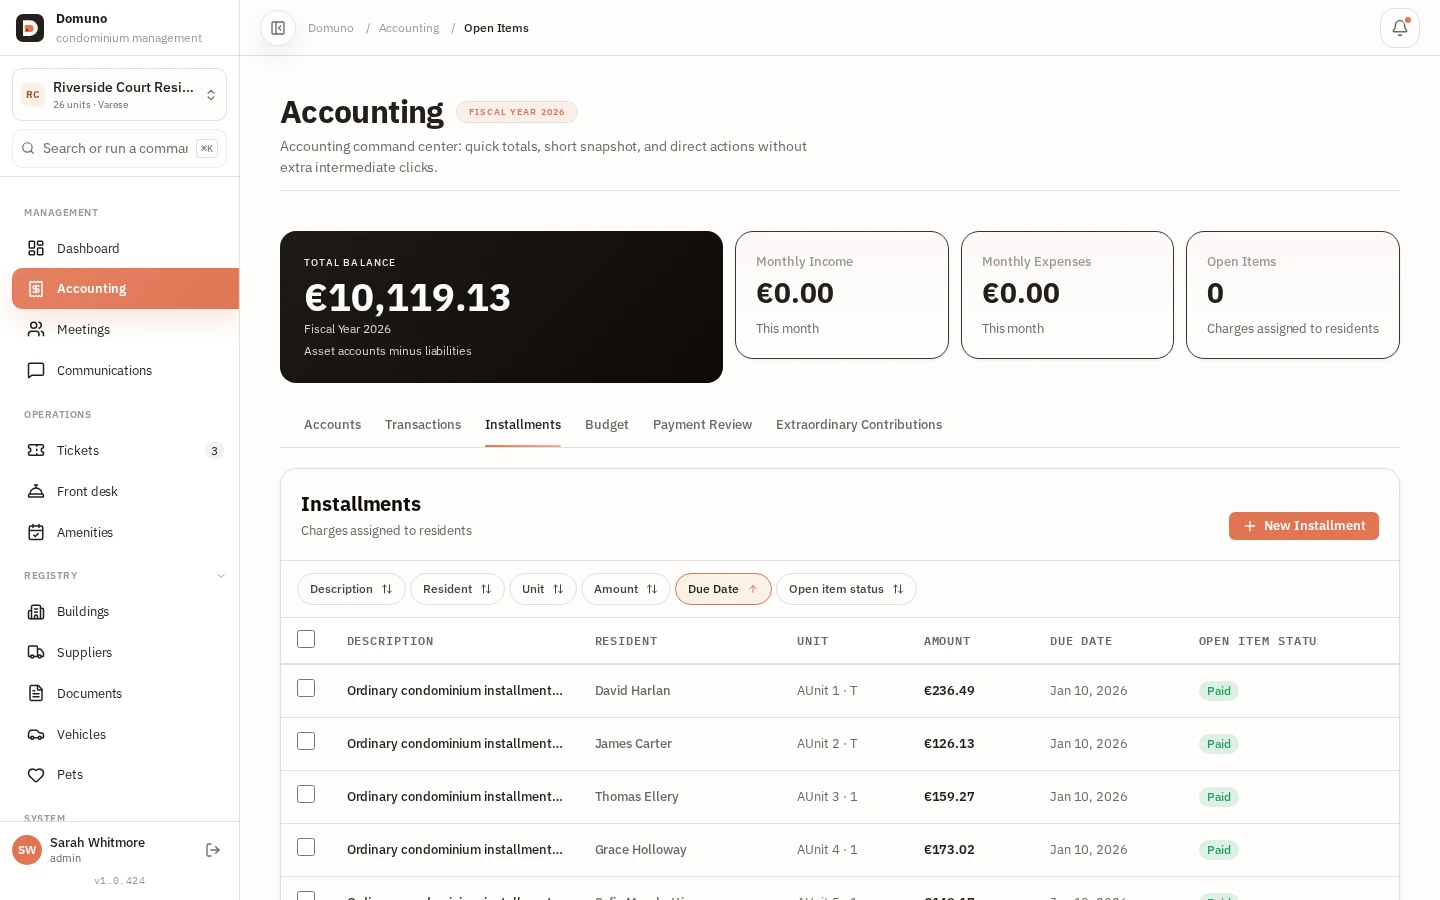
  1. In Accounting open the “Open items” tab.
  2. Each row shows the unit, amount, due date and “Status” (Paid / Overdue).
  3. To chase payments, filter by “Overdue” and review the delayed units.

Watch overdue charges

A charge that stays “Overdue” builds arrears. Review this tab regularly to spot delayed units early and take action.

Open-items tab: charges assigned to residents with payment status.
Next: Extraordinary contributions

Extraordinary contributions

What you will do: Fund major works and exceptional costs with installments.

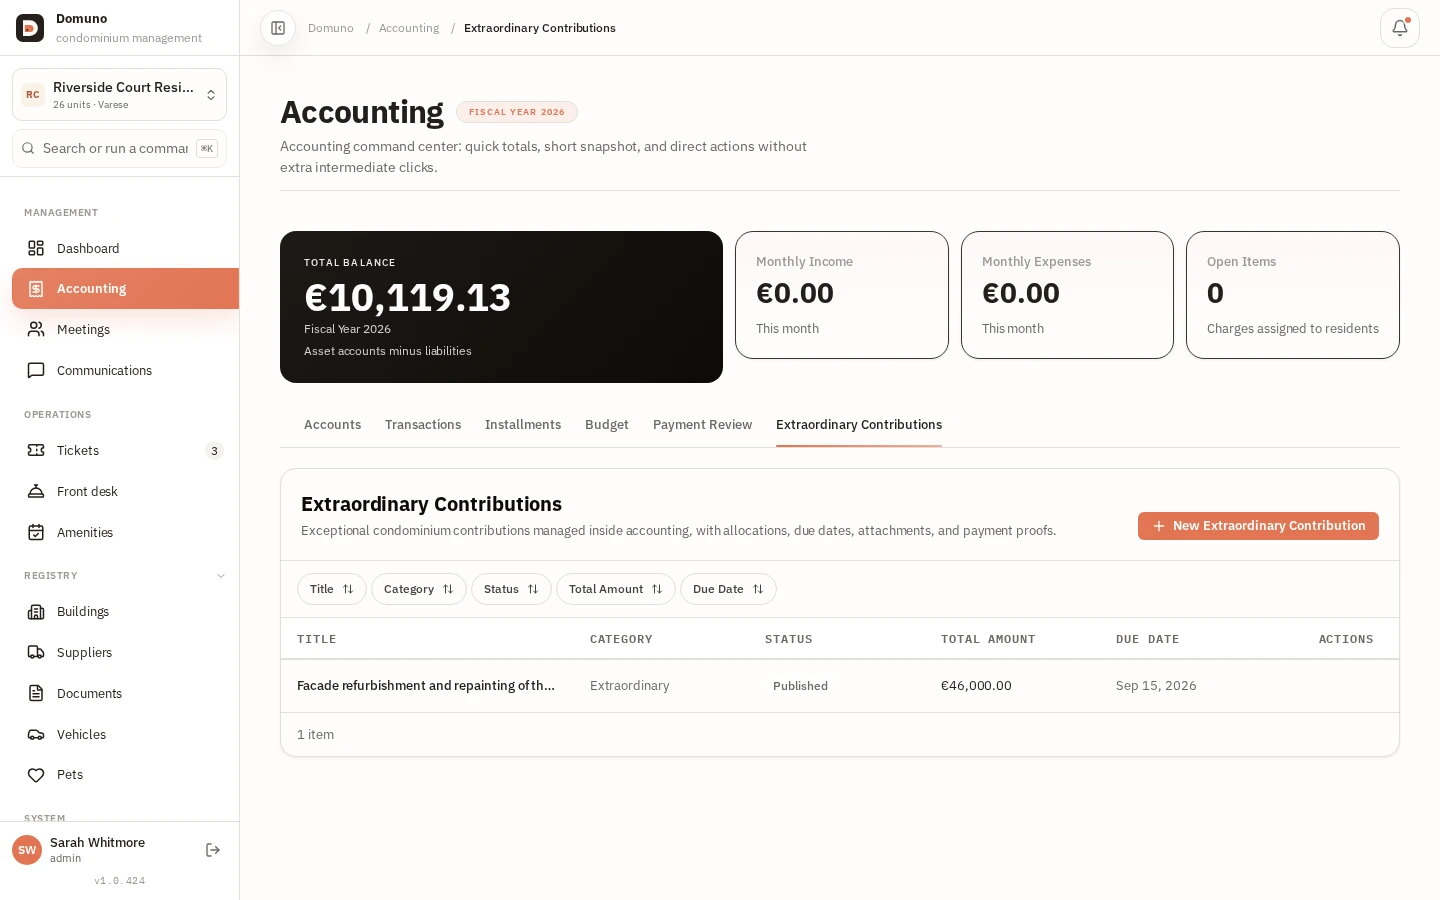
  1. In Accounting open the “Extraordinary contributions” tab.
  2. Click “New extraordinary contribution”.
  3. Fill in title, category, total amount and due date, then define the unit split.
  4. Publish it: it appears in the list with its status and is visible to residents under “Payments”.
An extraordinary contribution with category, status and due date.
Next: Tickets & maintenance

Tickets & maintenance

What you will do: Handle resident requests with assignment and deadlines.

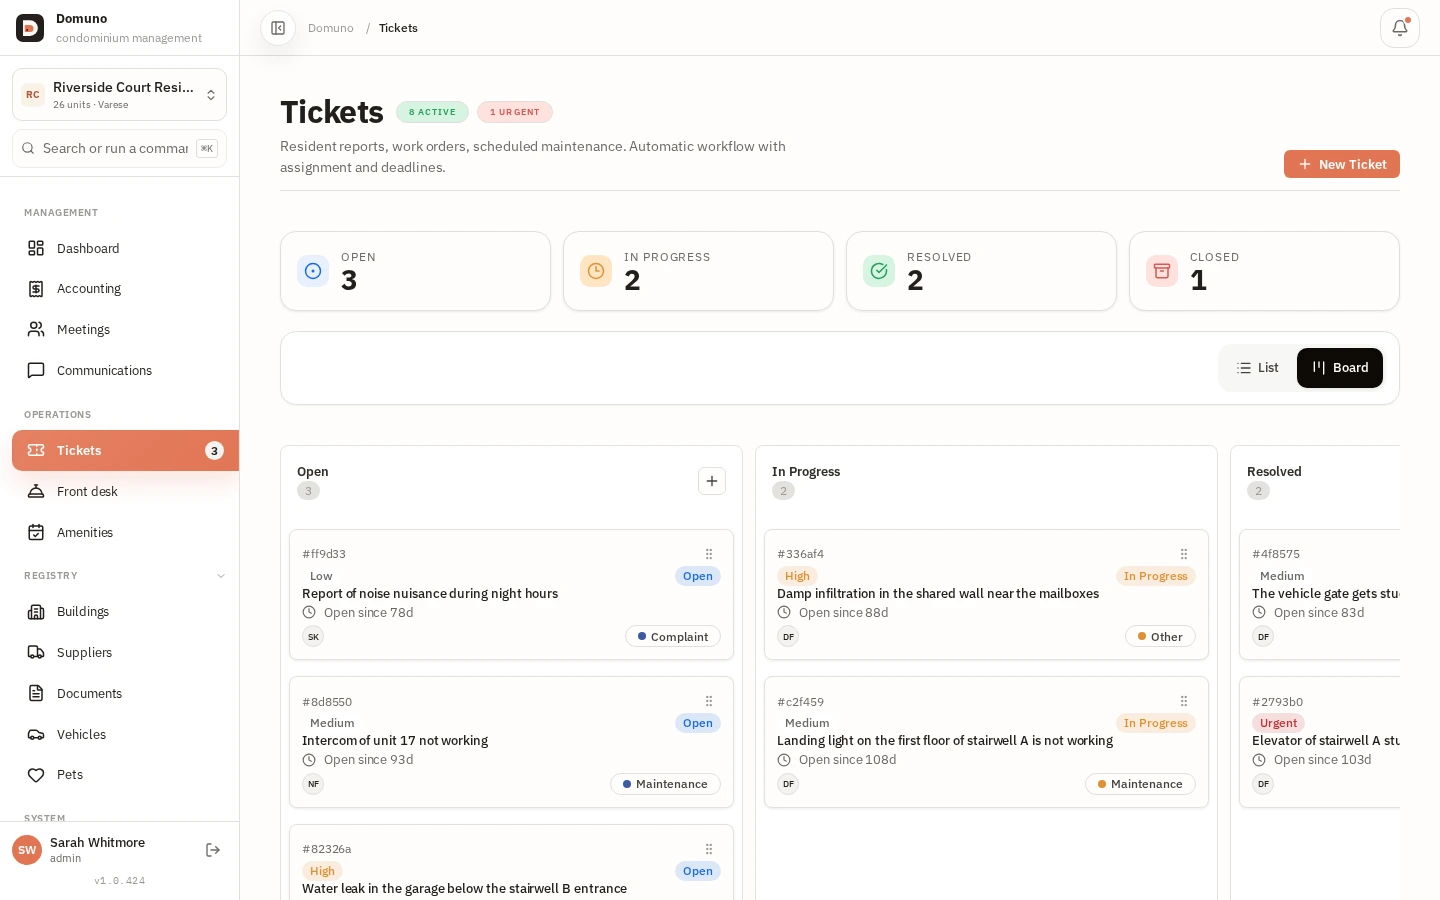
  1. Open “Tickets” in the sidebar.
  2. Use the “Board” view to follow tickets by status, or “List” for a table.
  3. Open a ticket to read its priority (Low/Medium/High/Urgent) and category.
  4. For a planned job, click “New intervention” and assign it to a responsible party.

Tip

Tickets marked “Urgent” (e.g. a stopped lift) are highlighted in the top counter.

Ticket board with priority, category and status of each request.
Next: Documents & files

Documents & files

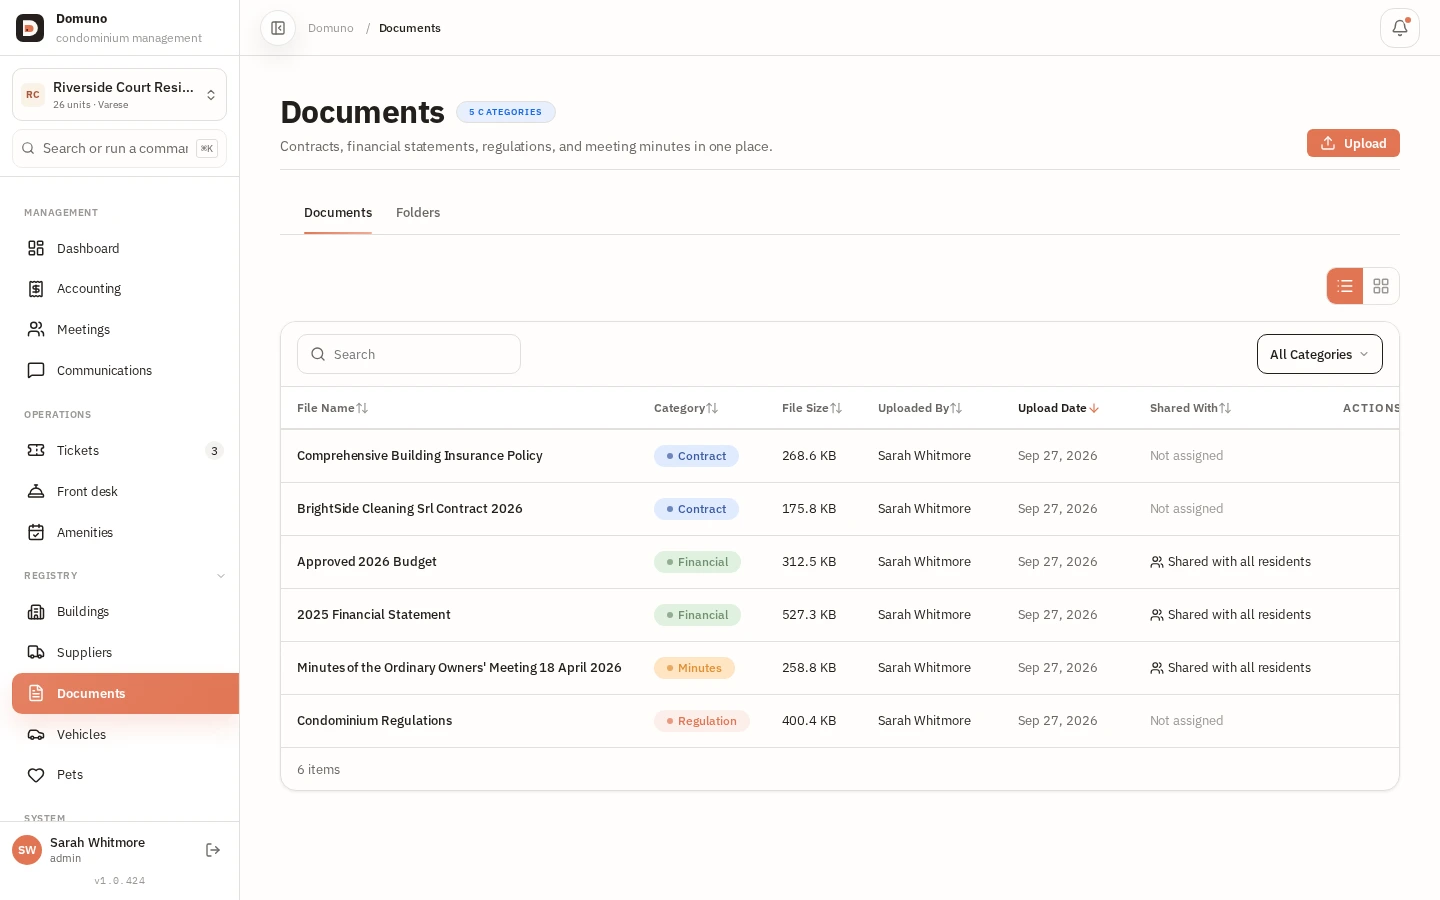
What you will do: Store and share contracts, financials and minutes.

  1. Open “Documents” in the sidebar and click “Upload”.
  2. Assign a category (Contract, Financial, Minutes, Bylaws) so it’s easy to find.
  3. If it concerns all residents, set sharing to “Shared with all residents”.
  4. Use the category filter to locate files quickly.
Document archive with category, size and visibility of each file.
Next: Communicate to residents

Communicate to residents

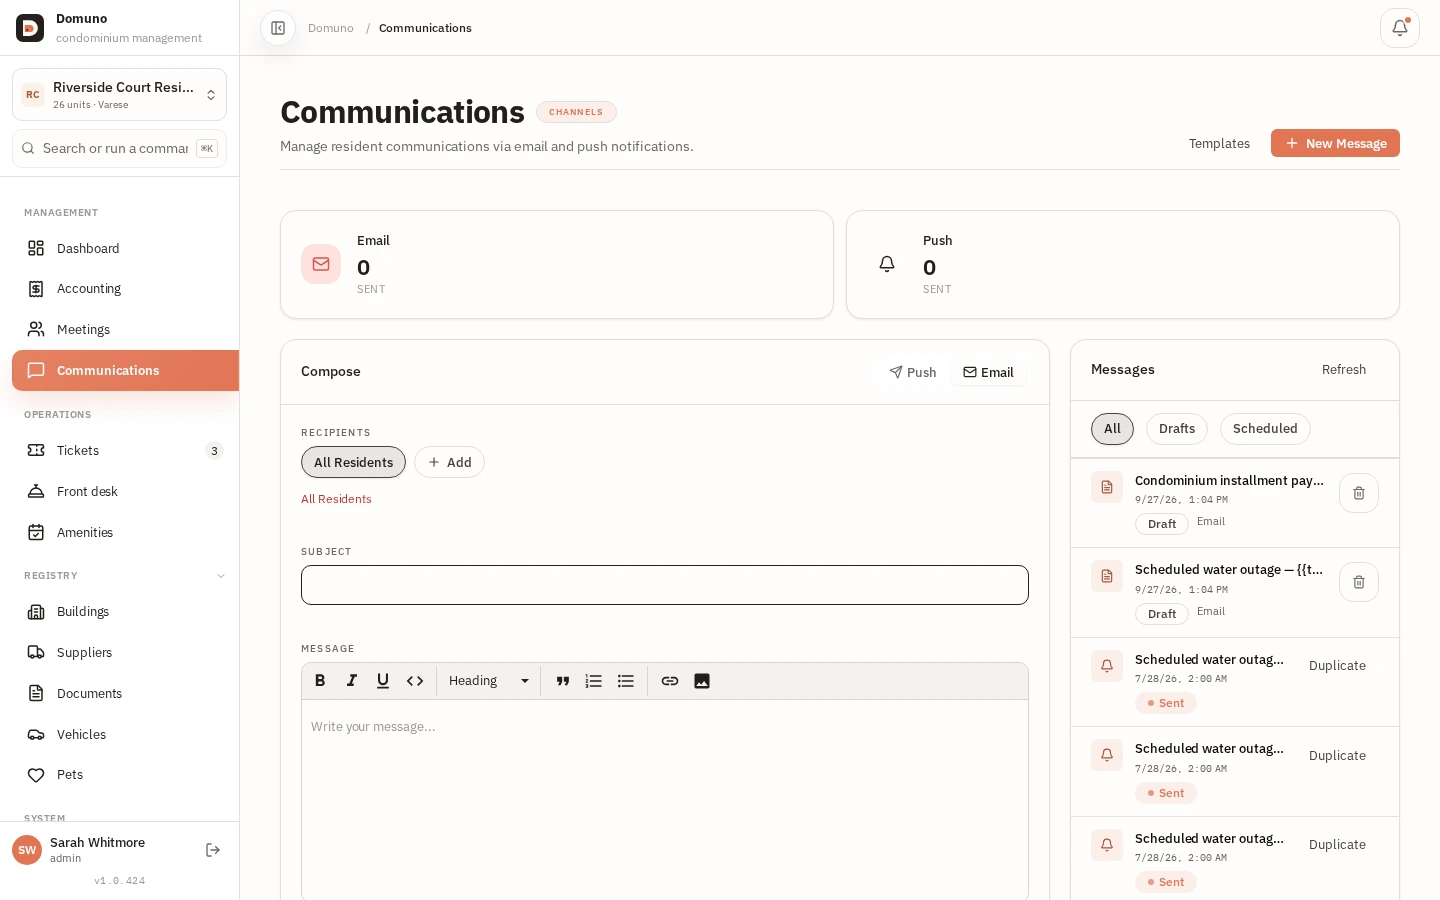
What you will do: Send notices via push and email, all on record.

  1. Open “Communications” and click “New message”.
  2. Choose the channel: Push or Email.
  3. In “Recipients” select “All residents” or add specific ones.
  4. Fill subject and message, then send or save as draft.

Tip

The “Messages” list shows a delivery bar for each communication with recipients reached (e.g. 27/27) and send status — handy to confirm a notice.

Composing a message with channel, recipients and the “Messages” list with delivery status.
Next: Suppliers & services

Suppliers & services

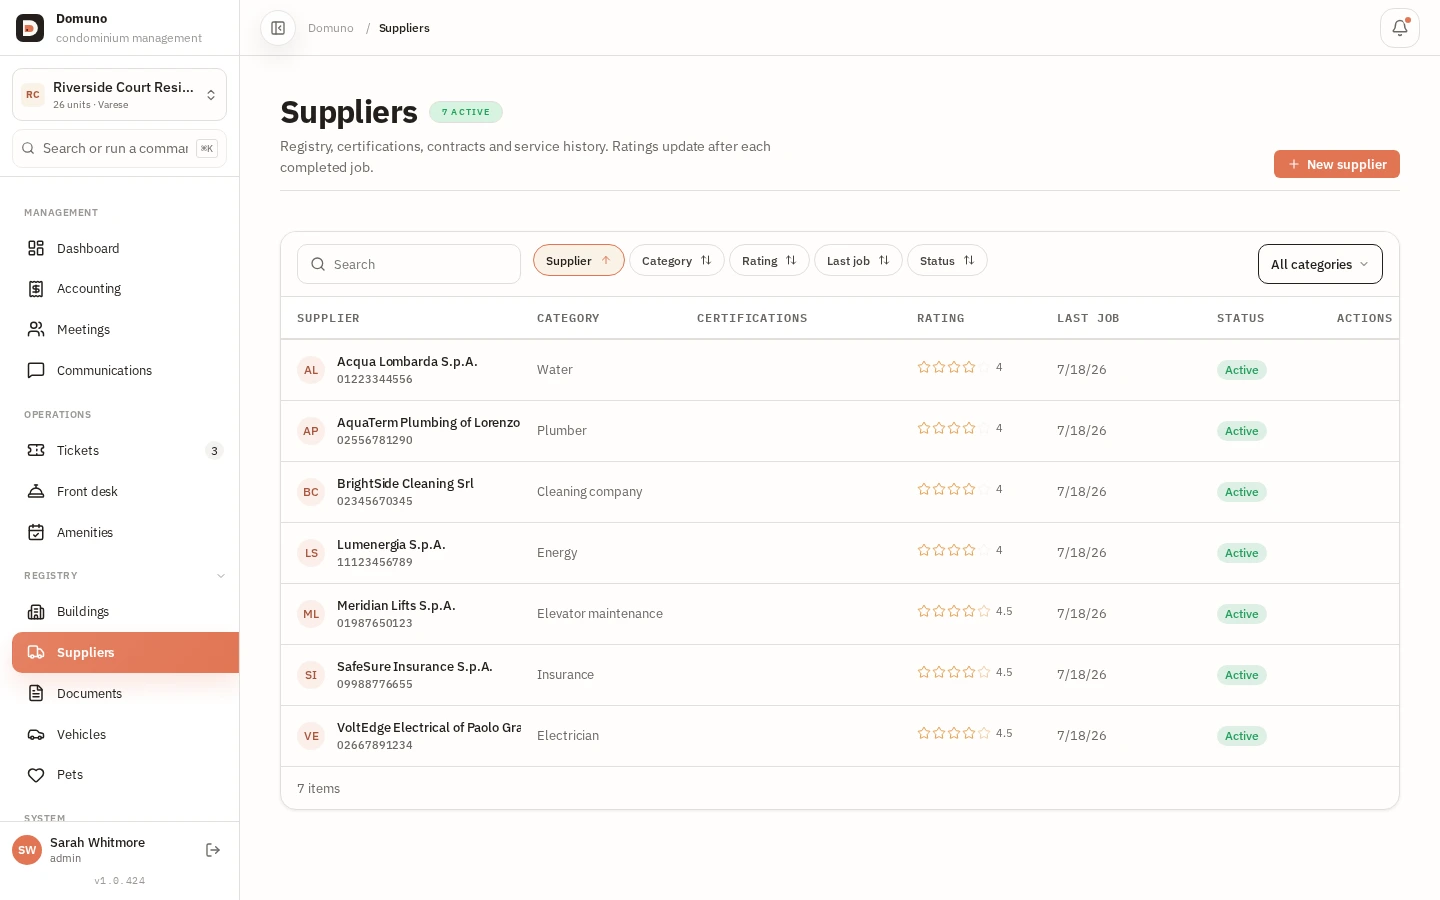
What you will do: Keep the supplier register with auto-recalculated ratings.

  1. Open “Suppliers” in the sidebar.
  2. Use the search or category filter to find a supplier (e.g. Plumber).
  3. Click “New supplier” and enter company name, category and contacts.
  4. Ratings update automatically as each job is closed.
Supplier register with category, rating and status.
Next: Meetings & e-voting

Phase 3 — Advanced routine

Meetings & e-voting

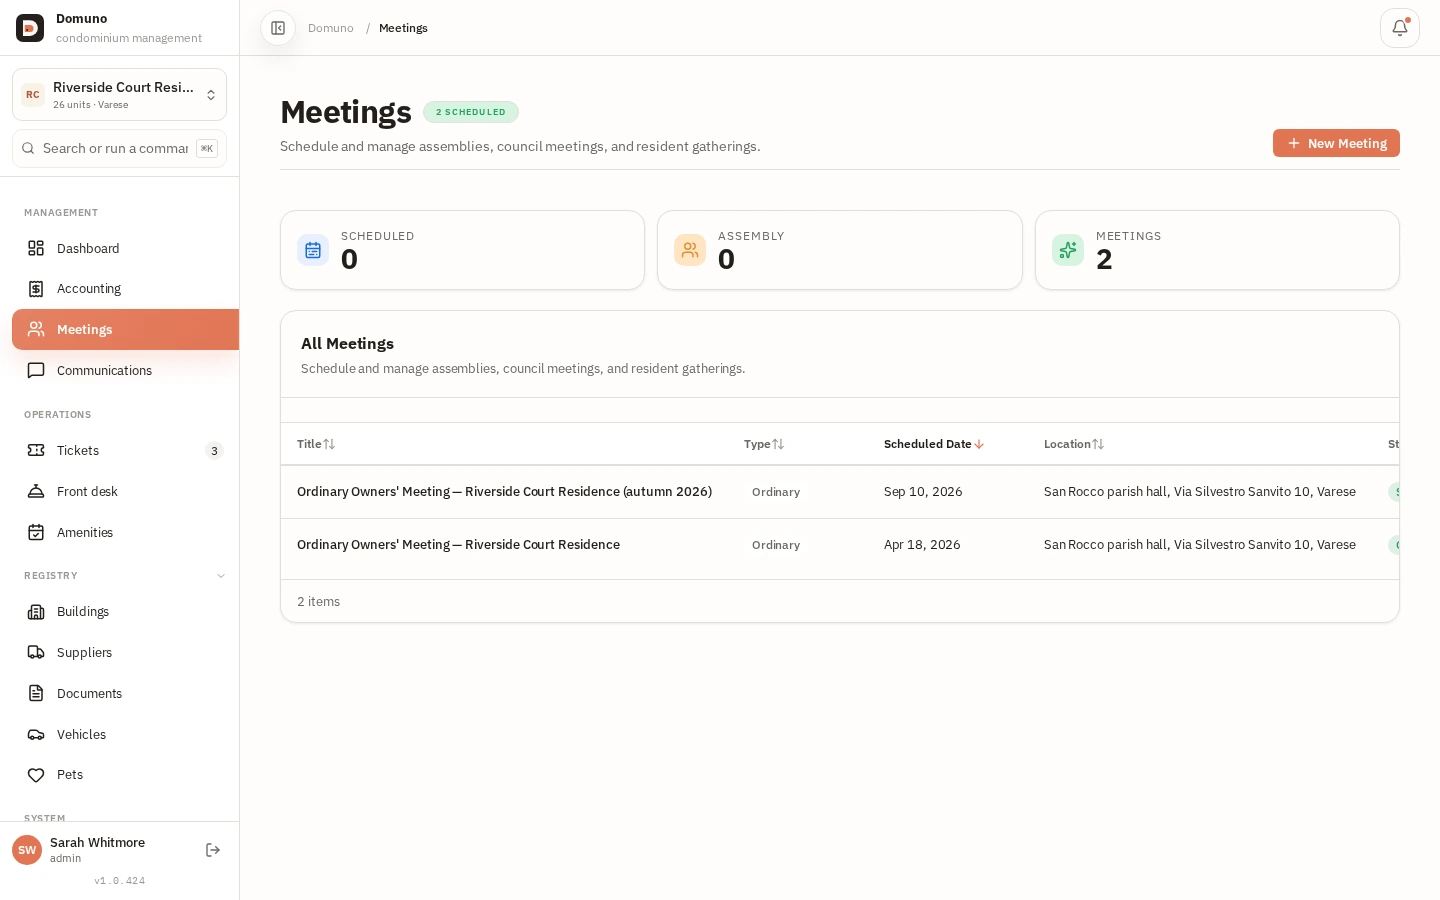
What you will do: Schedule, run and record meetings with online voting.

  1. Open “Meetings” in the sidebar and click “New meeting”.
  2. Enter title, type (e.g. Ordinary), date, time and location.
  3. Open the meeting to prepare its agenda and add supporting files under “Attachments”.
  4. Before and during the meeting, check attendees and quorum; start the meeting room when you are ready to chair it.
  5. Under “Polls”, create each question with answer options and monitor the votes.
  6. Record topics and decisions under “Minutes”; review the text and mark it approved once validated.
  7. Share the approved minutes and relevant materials with residents under “Documents”.
List of meetings with type, expected date, location and status.
Next: Users & access

Users & access

What you will do: Decide who gets in and what they can see.

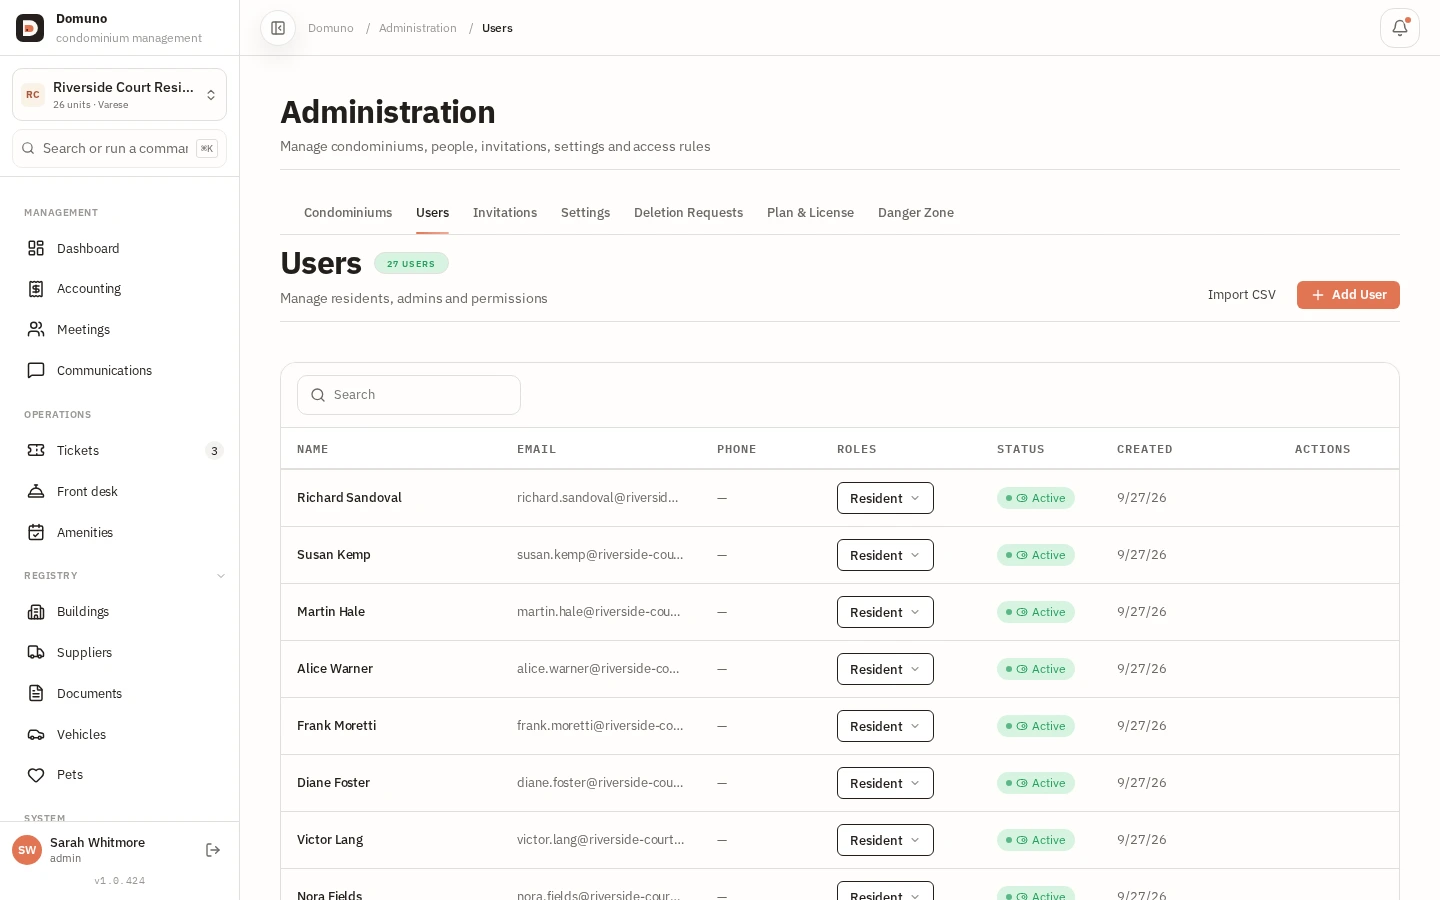
  1. Open “Administration” (gear icon) and go to the “Users” tab.
  2. Review name, email, role (e.g. Resident) and account status.
  3. Click “Add user” to invite a resident or staff member individually.
  4. In the “Permissions” tab configure, role by role, who reads, writes and deletes per module.
Users tab with the list of residents and administrators of the building.
Next: Plan & license

Plan & license

What you will do: Review your active plan and storage usage.

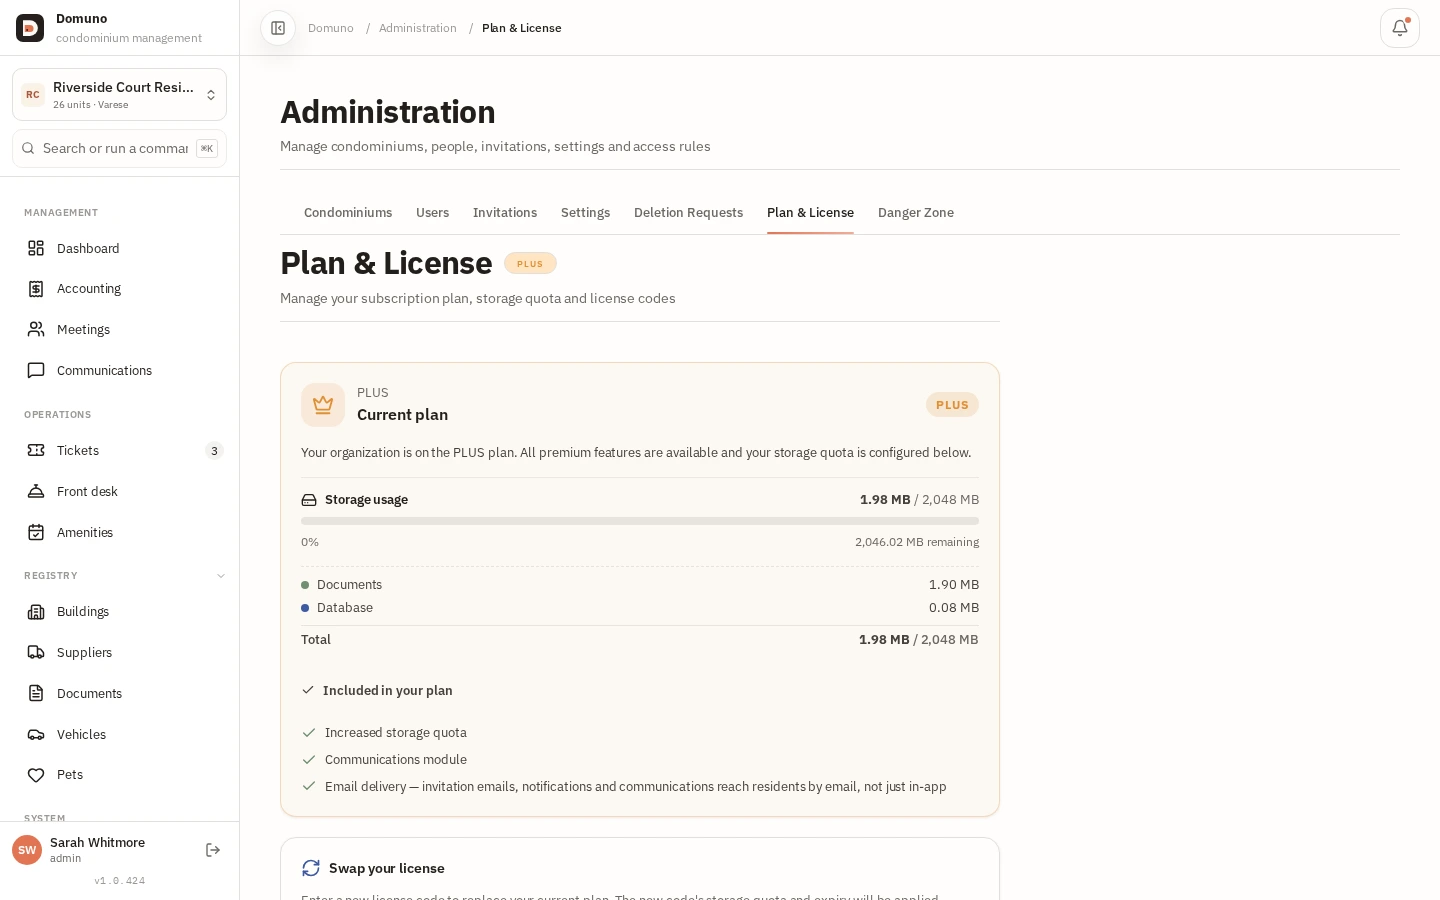
  1. Open “Administration” and go to the “Plan & license” tab.
  2. Check “Storage used” split between documents and database.
  3. If you have a new license code, enter it in the “Replace license” panel.

Tip

On Plus plans the premium modules (front desk, amenities, email) are enabled automatically.

Active subscription plan with storage usage and included features.
Next: Using on mobile

Using on mobile

What you will do: Manage the building from your phone, no app required.

  1. Open Domuno from your phone browser: nothing to install.
  2. Tap the three-line icon in the top-left to open the full menu.
  3. The dashboard shows the same indicators, stacked in vertical columns.
  4. You can open a meeting room, reply to urgent tickets and approve payments anywhere.
Manager dashboard on mobile with the hamburger menu open.

Ready to put it into practice?

Create your free account and follow the guide at your own pace. No credit card.

Create a free account